So you’re thinking about installing new countertops? Whether you’re a first-time homeowner refreshing a dated kitchen or a DIY enthusiast looking to save on renovation costs, understanding the countertop installation process can help you make informed decisions. Let’s walk through what you need to know before tackling this transformative home improvement project.
Overview of the Installation Process
The journey from selecting your dream countertop to enjoying your first meal prep on the finished surface involves several key steps. First comes the detailed measurement phase, where precise dimensions determine everything that follows. This isn’t just about length and width—it includes accounting for sink cutouts, backsplash heights, edge overhangs, and ensuring level surfaces.
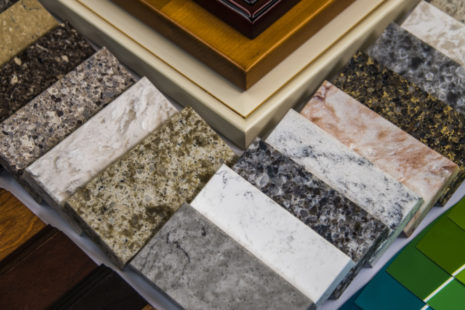
Next, fabrication transforms raw materials into your custom countertop. For materials like granite or quartz, this means cutting slabs to size, polishing edges, and creating cutouts for sinks and fixtures. This specialized work typically happens off-site at a fabrication shop with industrial-grade equipment.
The removal of existing countertops presents its own challenges, particularly ensuring that cabinets remain undamaged and plumbing and electrical connections are properly handled. This demolition phase requires careful planning to minimize kitchen downtime and manage debris disposal.
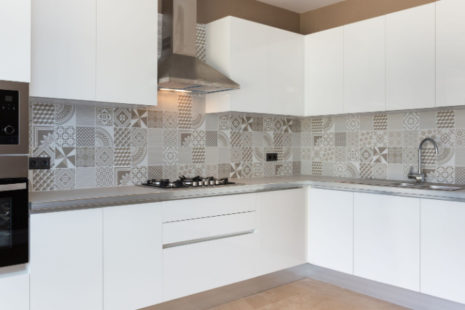
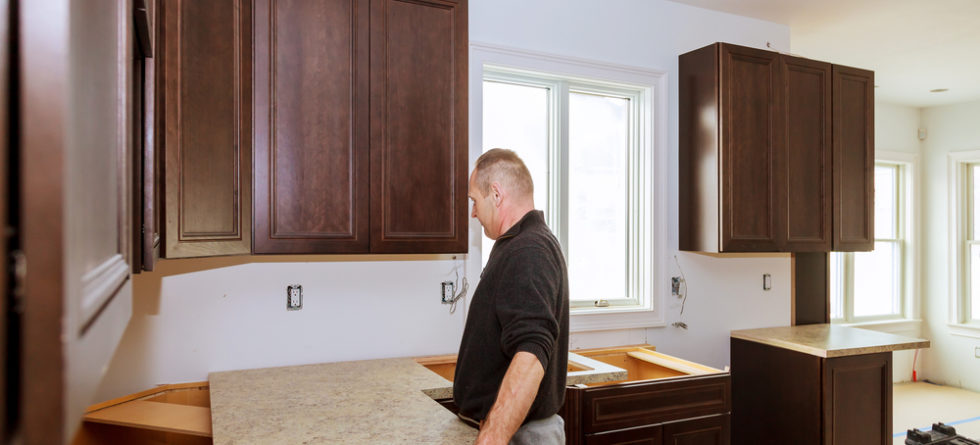
Finally, the installation itself involves securing the new countertops to your cabinets, making necessary plumbing connections, and addressing any seams between sections. Depending on the material, additional finishing steps like sealing may be required before your surface is ready for use.
Throughout this process, timing considerations can significantly impact your home routine. Most kitchens undergo a 2-5 day period where functionality is limited during the transition between old and new countertops. Planning alternatives for meals and daily activities during this window helps manage expectations.
Tools and Materials Needed
The specific tools required vary by countertop material, but several essentials apply across most installation types. For measurement and layout, you’ll need a quality tape measure, level, straightedge, and carpenter’s square. Some professionals now use laser measurement tools for maximum precision, but traditional methods work well with careful technique.
For securing countertops, you’ll typically use construction adhesive, silicone caulk, and sometimes mechanical fasteners like screws with appropriate anchors. The substrate material beneath your countertop often requires specific attachment methods—particleboard needs different hardware than plywood, for instance.
Material-specific tools include wet saws with diamond blades for cutting stone or tile, jigsaws for laminate, and specialized router bits for finishing edges. Safety equipment is non-negotiable: respiratory protection against dust, eye protection, and gloves appropriate to the materials being handled.
For seam joining in stone or quartz, epoxy adhesives color-matched to your specific material create nearly invisible connections between sections. Special clamping systems maintain perfect alignment during curing. These specialized items typically aren’t found in the average homeowner’s toolbox and may represent significant investment for a one-time project.
Sink and faucet installation requires plumbing tools including wrenches, plumber’s putty, and often specialized mounting brackets. The complexity increases with undermount sinks, which attach directly to the countertop underside rather than dropping in from above.
Common Challenges in Countertop Installation
Weight management presents one of the most significant challenges, particularly with stone countertops. A typical granite section for a kitchen island can easily weigh 200-300 pounds. Safe transport requires multiple people and sometimes specialized equipment. Attempting to maneuver such heavy materials without adequate help risks both personal injury and damage to the countertop itself.
Achieving perfectly level surfaces often proves trickier than expected. Most homes, especially older ones, have subtle variations in cabinet heights and wall straightness that become glaringly obvious when topped with an inflexible material like stone or quartz. Professional installers use shims and careful adjustment to compensate for these irregularities.
Precise cutouts for sinks, cooktops, and fixtures demand both accurate measurement and appropriate cutting techniques. The saying “measure twice, cut once” takes on new meaning when working with expensive materials where mistakes can’t be undone. Templates created before cutting help minimize errors.
Seam placement and alignment can make or break the visual appeal of your finished countertop. Strategic positioning of seams in less visible areas, properly supporting both sides during adhesive curing, and careful finishing techniques all contribute to creating connections that disappear into the overall design rather than drawing attention.
For complex projects involving waterfall edges (where the countertop material continues vertically down the side of a cabinet), corner transitions, or unusual layouts, the complexity multiplies. These advanced design elements require specialized fabrication techniques and installation experience to execute successfully.
Professional vs. DIY Installation: Pros and Cons
The decision to hire professionals or tackle installation yourself hinges on several factors worth honest evaluation. Professional installation offers significant advantages, particularly warranty protection. Most manufacturers’ warranties require professional installation to remain valid. Additionally, professionals bring specialized tools and techniques developed through years of experience, often completing in hours what might take a DIY enthusiast days of careful work.
Risk management also favors professional installation. The financial consequences of damaging expensive materials during DIY installation can quickly exceed what you’d have paid for professional services. Additionally, professionals carry insurance to cover any accidental damage to your home during the process.
That said, DIY installation offers compelling benefits for certain materials and situations. Laminate countertops with pre-formed edges and simple layouts present reasonable DIY challenges for those with basic woodworking skills. Tile countertops, while labor-intensive, can be successfully installed by careful homeowners willing to learn proper techniques. These materials also tend to be more forgiving of minor mistakes.
The cost comparison deserves careful consideration. While DIY obviously saves on labor costs (typically 20-30% of total project expense), you’ll need to factor in tool purchases or rentals, potential material waste from errors, and the value of your time. Additionally, professionals often receive preferential pricing on materials that partially offsets their labor charges.
Perhaps the most honest assessment involves matching the project complexity with your skill level. Simple, straight runs of laminate in a powder room? Potentially DIY-friendly. Complex kitchen layout with expensive quartz, multiple sink cutouts, and seam requirements? The professional route likely delivers better long-term value and satisfaction.
For those determined to handle installation personally while minimizing risks, hybrid approaches exist. Some fabricators offer “fabrication only” services, delivering precisely cut materials ready for you to install. Conversely, some homeowners handle demolition and preparation themselves, bringing in professionals only for the critical installation phase.
The countertop installation process, while complex, becomes manageable with proper planning and realistic expectations. Whether you ultimately choose professional installation or the DIY path, understanding what’s involved helps you make informed decisions and achieve the beautiful, functional surfaces that transform your daily experience at home.
Remember that in home improvement, sometimes the wisest investment isn’t just in premium materials, but in the expertise required to showcase them at their best. Your countertops will likely serve you for decades—making the installation process worth approaching with the care and consideration it deserves