New countertops are one of the most exciting upgrades you can make to a Wichita home, and one of the first questions we hear is “So what actually happens between picking a slab and cooking on it?” The honest answer is that every project is a little different, but the steps are nearly always the same. Knowing them ahead of time makes planning, scheduling contractors and living without a kitchen a lot less stressful.
Here’s a walk-through of a typical countertop project, from the first conversation to the final wipe-down.
Step 1: The Free Estimate and Design Conversation
Every project starts with a conversation about your space, how you use it and what you want it to look like. This is when you’ll talk through material options, edge profiles, sink and cooktop plans, backsplash ideas and any cabinet work. A rough measurement or a set of drawings is usually enough to put together an estimate.
If you’re still deciding between materials, it helps to read up first. Our pages on quartz countertops, granite countertops and quartzite countertops cover the basics of each.
Step 2: Choosing Your Stone
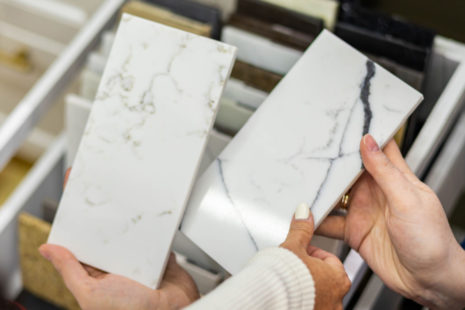
This is the fun part. Seeing material in person matters, especially for natural stone, because no two granite or quartzite slabs are exactly alike. Engineered quartz from brands like Cambria, Silestone and MSI is more consistent, but colors can still look different under showroom lighting than in a photo.
Tips for picking a slab
- Bring samples from home. A cabinet door, flooring piece or paint swatch makes it much easier to judge color.
- Look at the whole slab. Veining and movement can change a lot from one end to the other.
- Think about seams. Larger kitchens and L-shaped layouts may need more than one piece, so ask where seams are likely to fall.
You can browse options on our stone selection page before visiting the showroom.
Step 3: Getting Ready for Templating
Before anything can be measured precisely, your cabinets need to be fully installed, level and secured. If you’re replacing cabinets too, this is the stage where that work wraps up. (Considering new cabinets? Take a look at our cabinet lines.)
It’s also the time to have these on hand or decided:
- Your sink, ideally on site, plus the faucet model and number of holes
- Cooktop or range specifications
- Any special features such as a farmhouse sink, waterfall edge or overhang for seating
Having those details settled before templating typically prevents delays later.
Step 4: Templating
Templating is where exact measurements of your cabinets and walls are taken so the stone can be cut to fit. Walls are rarely perfectly straight, so precision matters here. We use digital templating to capture the layout accurately.
Plan on someone being home during the appointment to answer questions about overhangs, seam placement and fixture locations.
Step 5: Fabrication
Once the template is finished, your slab is cut, the sink and cooktop openings are made, edges are profiled and the surface is finished. Fabrication time depends on the material, the complexity of the layout and the current schedule, so ask for an estimated install date when you’re templated.
What can affect how long fabrication takes?
- Detailed edge profiles or mitered edges
- Large islands, waterfalls or full-height backsplashes
- Material that needs to be ordered rather than pulled from stock
- Changes made after templating
Step 6: Installation Day
On install day, the crew brings in the finished pieces, sets them, joins and finishes any seams, and secures everything in place. Many installs are completed in a single visit, though bigger or more complex jobs can take longer.
How to prepare
- Clear a path from the driveway to the kitchen or bathroom.
- Empty the tops of cabinets and remove anything fragile nearby.
- Keep kids and pets out of the work area.
- If old countertops are being removed, confirm ahead of time who handles that.
Step 7: After the Install
Once the countertops are in, your plumber can typically reconnect the sink and faucet, and backsplash tile can go up. Ask the installer whether there’s any waiting period before using the sink or reconnecting plumbing, since that can vary by job.
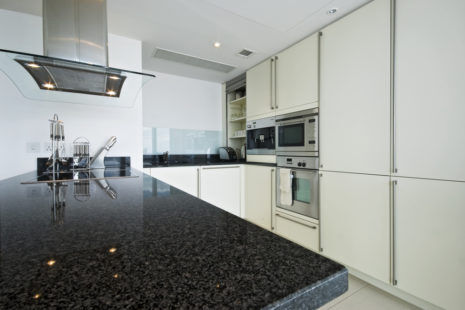
From there, it’s mostly about care. Quartz needs very little upkeep, while granite and quartzite may benefit from periodic sealing depending on the stone.
Frequently Asked Questions
Do my cabinets have to be installed before templating?
Yes. Templates are made from the actual cabinets, so they need to be installed, level and permanent first. Measuring before then usually leads to pieces that don’t fit.
Do I need my sink before the templating appointment?
In most cases, yes. Undermount sinks especially need to be on hand so the cutout matches exactly. Faucet details matter too, since they determine how many holes are drilled.
Can I use my kitchen during the project?
You can typically use most of your kitchen until the old tops come out. The sink is usually unavailable from removal until plumbing is reconnected after install, so plan a few easy meals.
What slows a countertop project down?
The most common causes are cabinets that aren’t ready, missing sink or appliance specs, and design changes after templating. Settling those early keeps things moving.
Do you serve areas outside Wichita?
Yes. We work throughout the Wichita area and surrounding communities. See our service areas page for the full list.
Ready to Start Your Countertop Project?
Countertop Concepts has been a family-owned Wichita business since 2010, and we’re happy to walk you through every step. Call us at (316) 440-7415, request your free estimate online, or stop by our showroom at 2919 E Douglas Ave, Monday through Friday 9 to 5 and Saturday 9 to noon.